The receipt entry serves as a digital invoice book of receipts for the overview of all invoices from your suppliers. In the list view, all invoices of a certain period and/or supplier with the desired project status appear according to the filter choice.
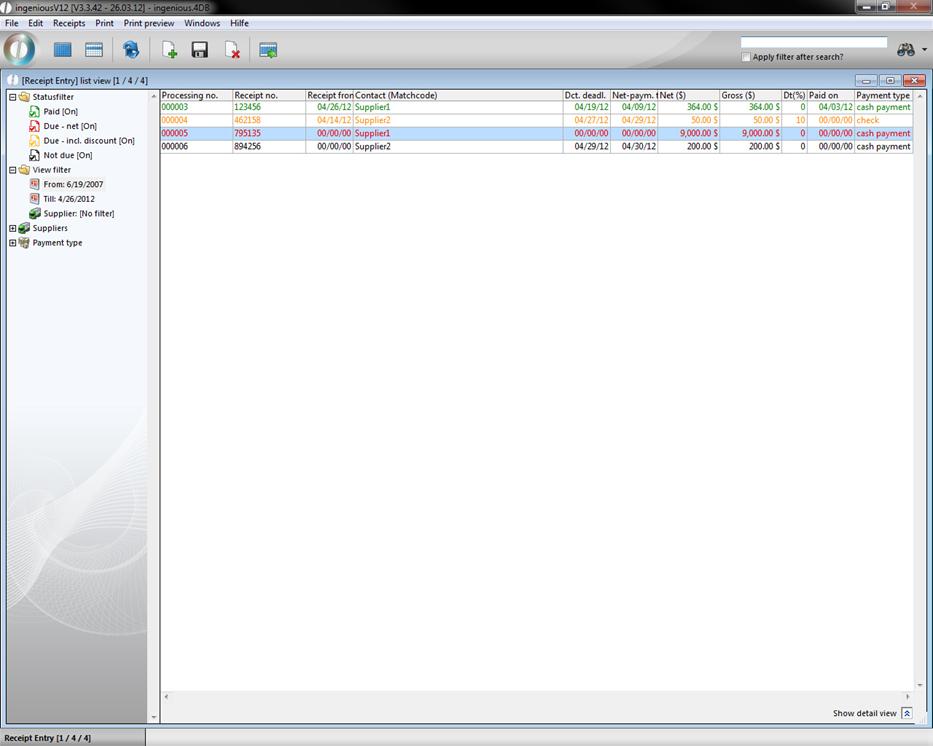
The invoices that were already paid are shown in green in the list. For the not yet paid invoices, there are 3 color indicators: Invoices in red font are due in net or overdue; the invoices due that still lie within the discount payment term are indicated in orange and not yet paid, and invoices not yet due are shown in black. For the colored due date mark, two days were given as a buffer time, so that the payments can be released on time. In the lower window border, an analysis can be shown for selected documents. The overall turnover as well as open posts of the marked entry documents can be shown with ![]() .
.
Assignment of document numbers
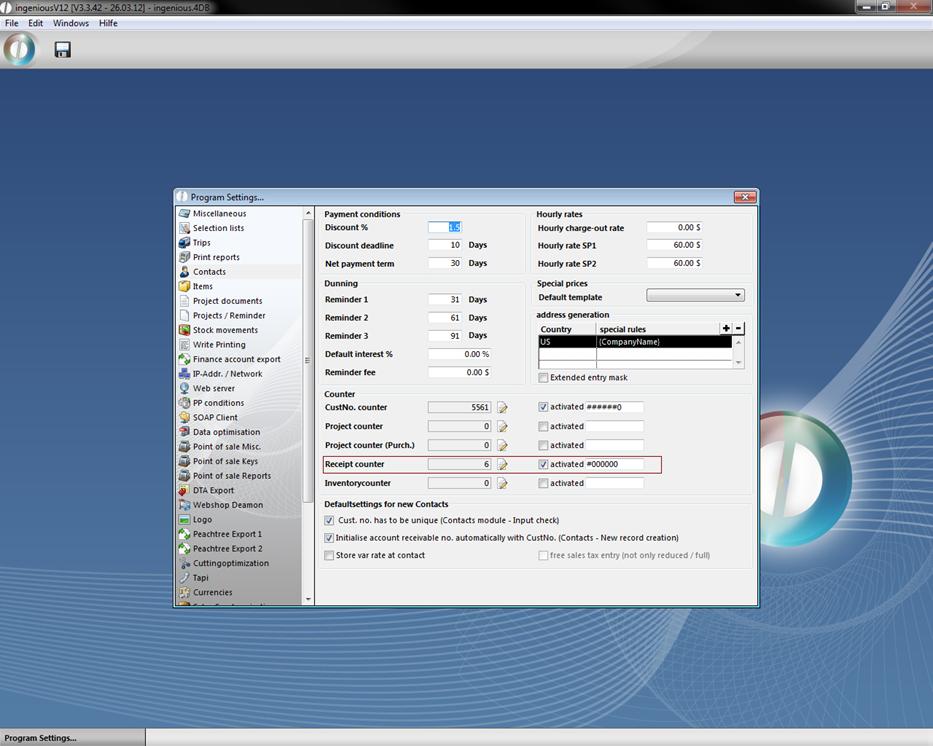
Ingenious.V12 automatically gives every document a unique sequential number that you can enter in the program settings under the item “Contacts”. For this, activate the suitable field with a mouse click. The assignment of a unique sequential receipt number corresponds to the accounting form regulations and makes it easier for you to find documents.
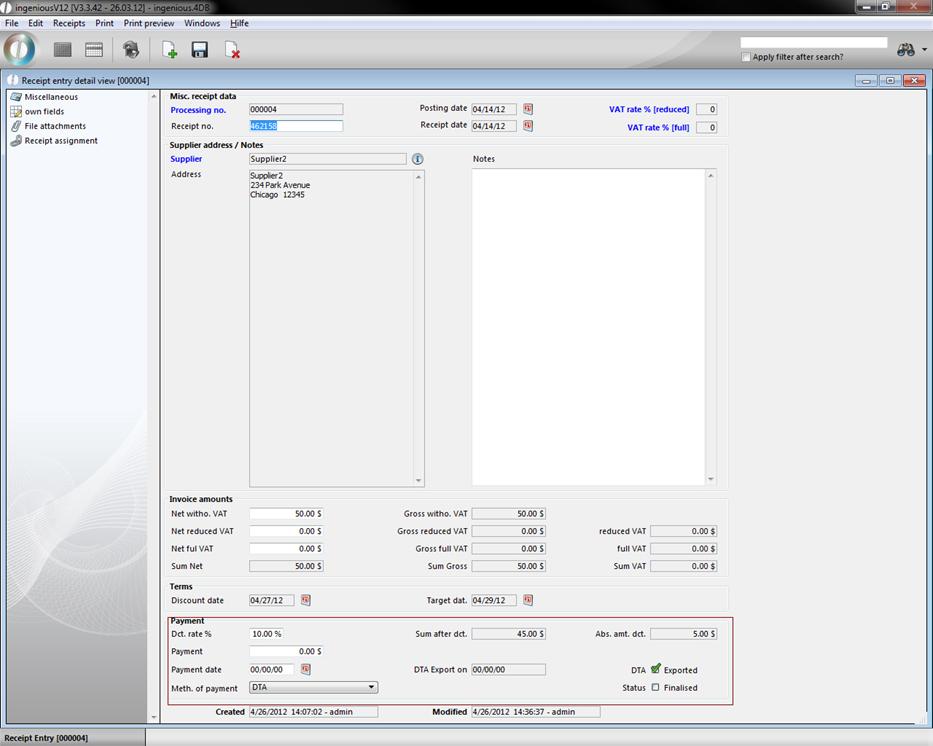
Creation of an incoming invoice
In order to now provide a new incoming invoice, click in the documents entry module on the ![]() button and enter the information about “General document data”, “Delivery address / Notes”, “Invoice amounts” and “Payment” in the next window. A calendar is available for the entry of the invoice date and the due dates whereby you transmit the date simply by clicking on the suitable day. The note field is intended for your individual notes pertaining to individual invoices. Here you can therefore enter, for instance to which project the charged services are assigned.
button and enter the information about “General document data”, “Delivery address / Notes”, “Invoice amounts” and “Payment” in the next window. A calendar is available for the entry of the invoice date and the due dates whereby you transmit the date simply by clicking on the suitable day. The note field is intended for your individual notes pertaining to individual invoices. Here you can therefore enter, for instance to which project the charged services are assigned.
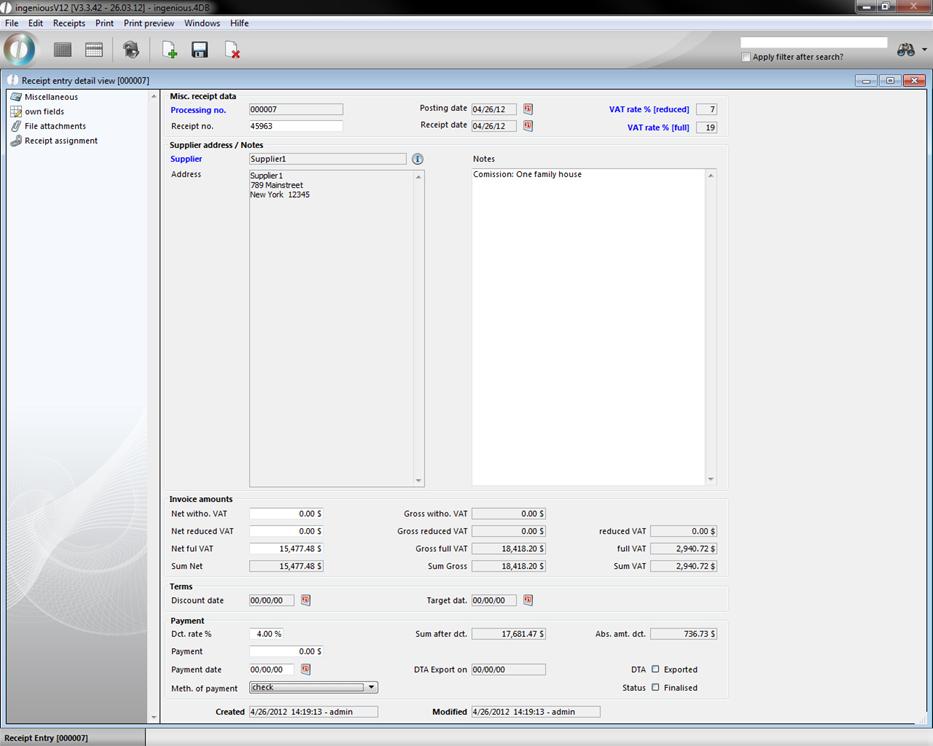
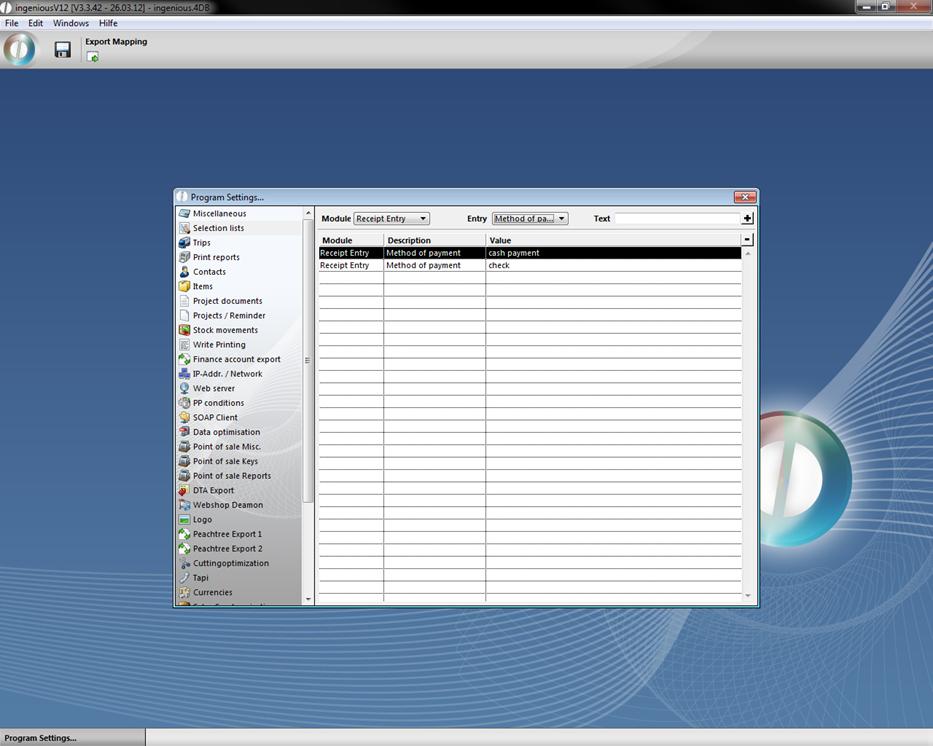
You must enter the invoice amounts only in net and thus separate them according to value added tax, full or half a value added tax. Then Ingenious.V12 automatically calculates the value added tax and the gross amounts of the single sums and the total sum. With a Drop-Down menu, you can indicate how the invoice will be paid. You can set the options appearing here in the program settings under the menu “Selection lists” yourself.
In the “Receipt assignment” column, you have the possibility to assign the document to a certain project. A more precise explanation of this column subsequently follows. After you have entered the receipt, close the detail view by clicking on the ![]() button. Now the document provided last is shown in the list view.
button. Now the document provided last is shown in the list view.
Receipt assignment
The column, “Document allocation” makes it possible for you to make a connection between input invoice documents and source invoice documents. Thus you know, for instance, in case of a customer complaint, from which retailer you have purchased the product. On the other hand, if a retailer must take back a product because of defectiveness again, you can see right away which customers have bought the article. The allocation of the suitable documents occurs in the workflow in the detail view of the invoice. Here you open the desired article in the “Items” column by double-clicking the items detail view.
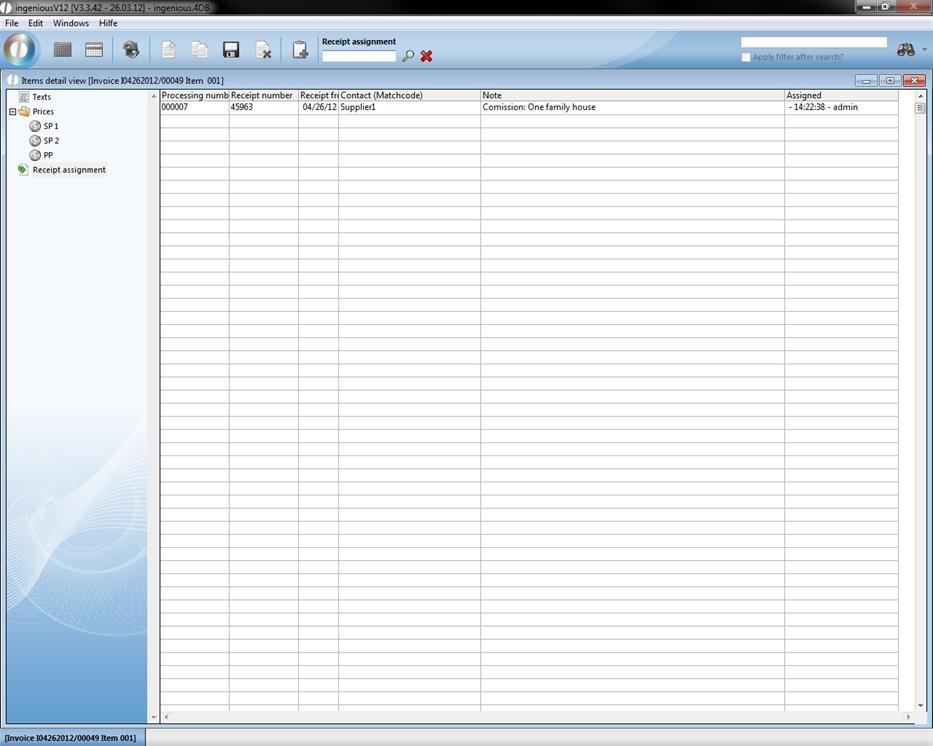
In the “Document allocation” column, you can choose the suitable retailer or supplier with the search function ![]() in the list view. In addition, the document can be assigned to the receipt number, the document number or the contact.
in the list view. In addition, the document can be assigned to the receipt number, the document number or the contact.
In the receipt entry in the detail view of the retailer, you see the assigned article in the “Receipt assignment” column. Attention: you must at first save the changes in the project.
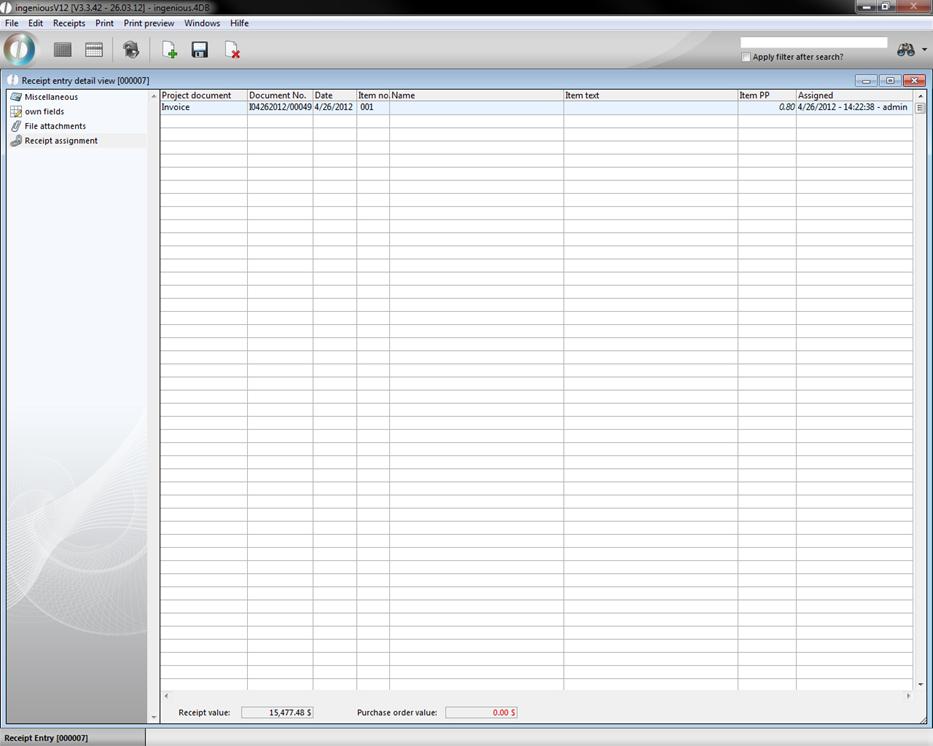
The purchase prices are shown in color: if you posted inventory in the purchases column, prices are in green, when only parts are booked then prices are blue, and if there is nothing booked, prices are in red. According to the color of the lines, you can recognize in which module the receipt is entered (blue = workflow; yellow = purchase)
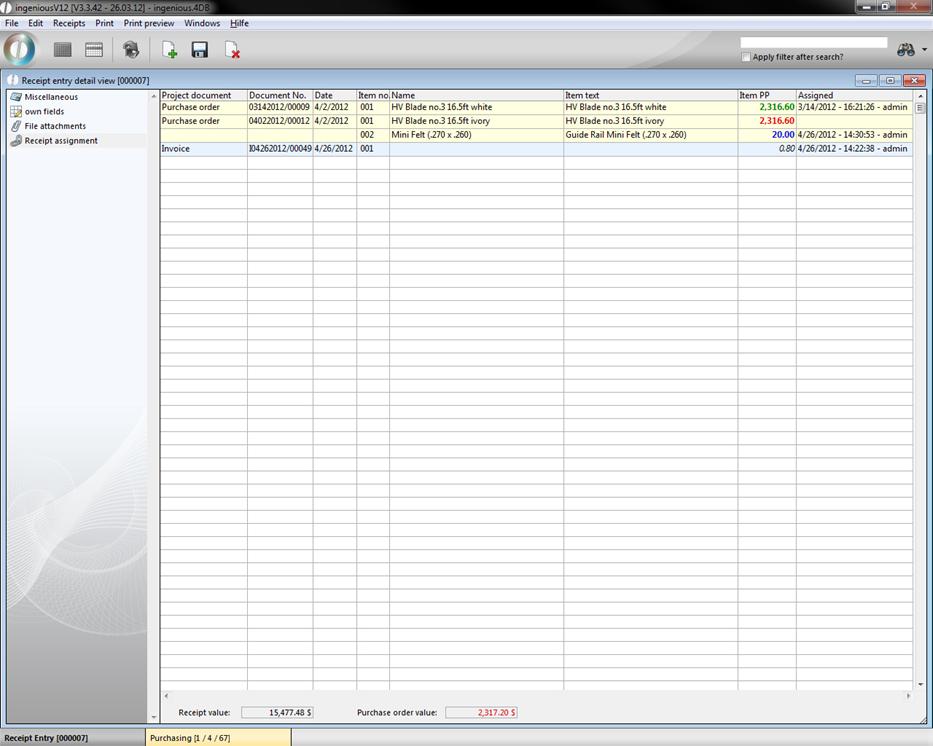
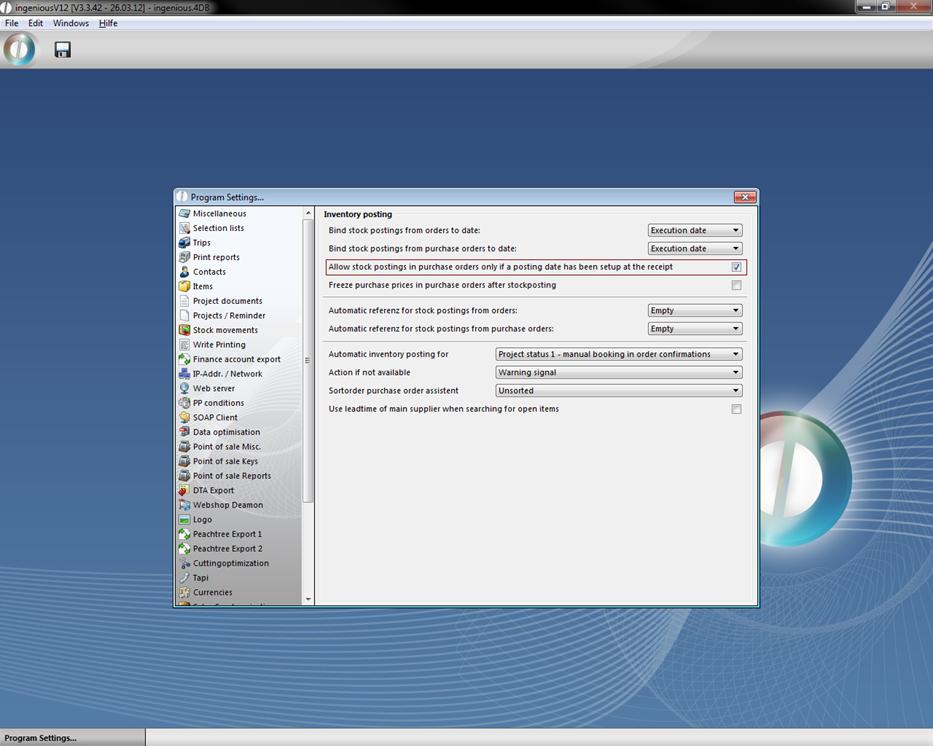
For a better link of entry receipts and inventory postings, in the column “ Inventory rotation” of the program settings it can be determined that inventory postings for orders are only possible, if an entry date shows on the receipt.
Collecting payments
In order to collect payments, you open the detailed view of the document and you enter the amount paid in the “Payment” area. You can insert the payment date with the calendar. Afterwards, close the detail by clicking on the cross in the window and secure the changes. Now the document is shown in green in the list view.
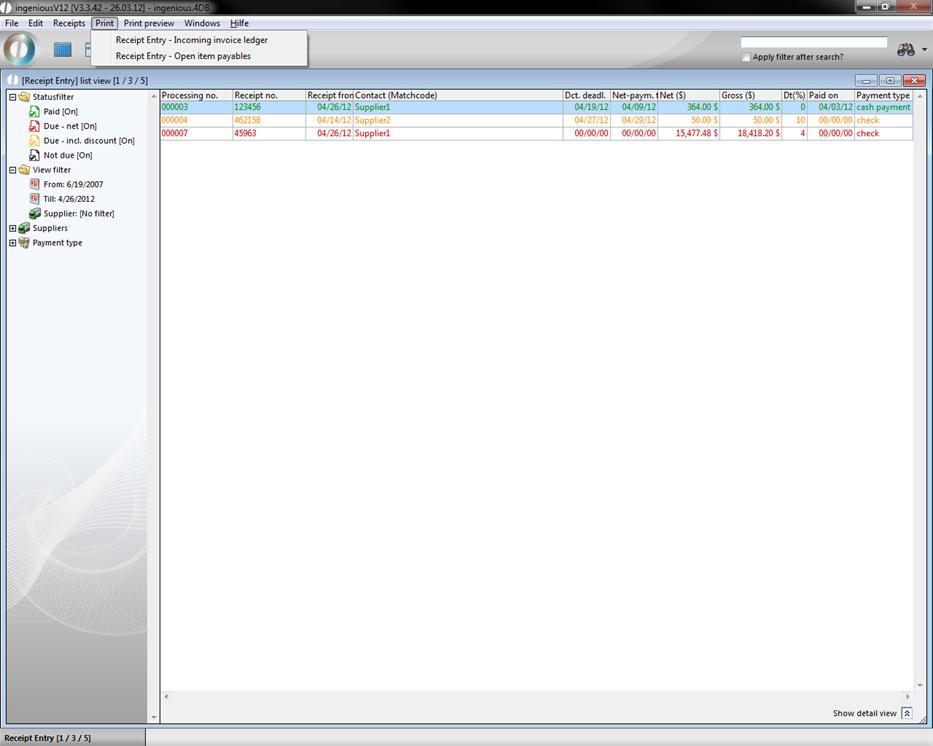
Printing documents
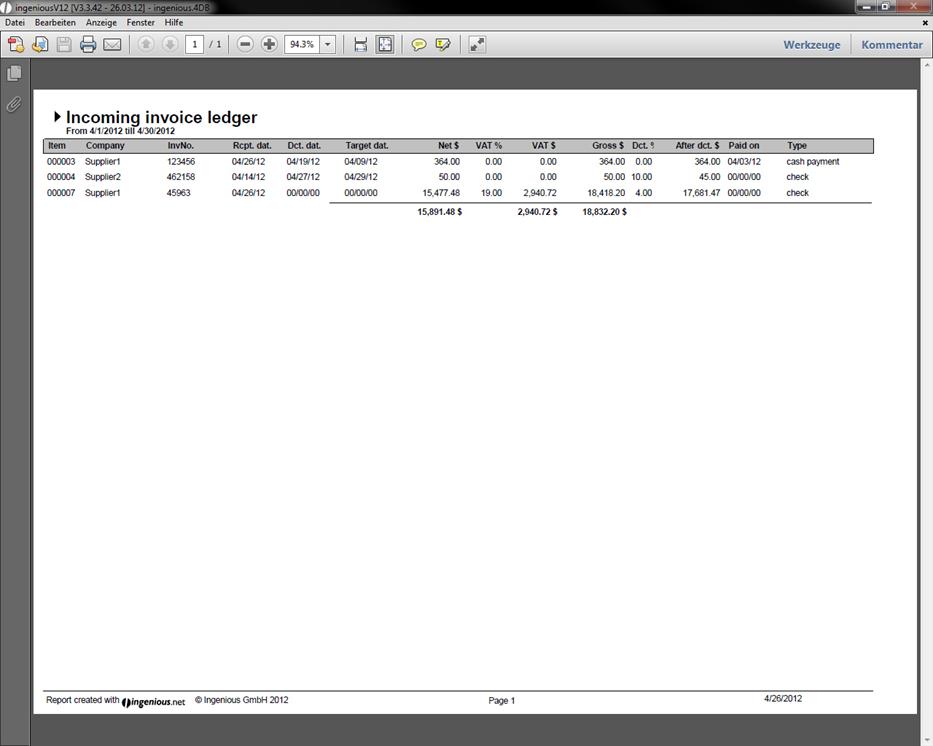
The “Incoming invoice ledger” and “Open item payables” were integrated into Ingenious.V12 for your documents, or for the transfer to the tax adviser or to your accounting. You select the menu item “Print” from the list view of the receipt entry module. Afterwards decide on the type of the desired report.
In the appearing dialog, you determine which selection should be transferred in the list. Afterwards you choose the time period for the report.
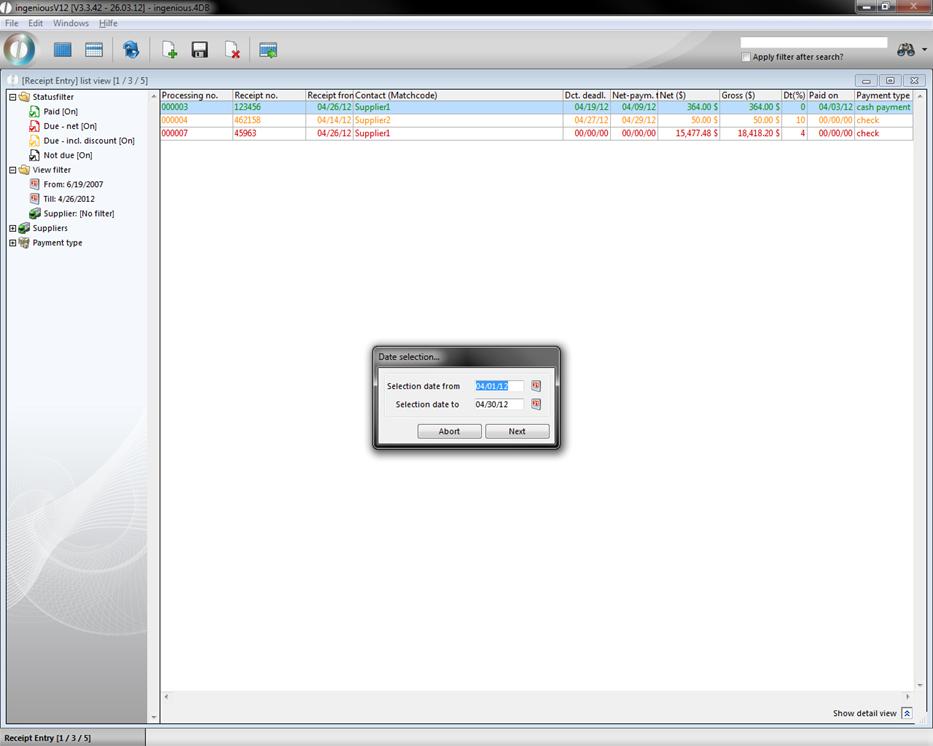
After confirming the print dialogs, you receive the report and can print this out on your standard printer.
Exporting documents
The DTA export is a simple interface for the transmission of transfers from the Ingenious.V12 receipt entry in various banking programs. In order to make an export possible, the “DTA” option is entered next in the detail view of the document in the “Payment type” field. (If not available, add these in the program settings in the “Selection lists” column). You reach the DTA export with the “Receipts” menu. The export manager generates a list of all possible transfers and automatically enters the amounts and texts (receipt number and date, customer number or discount). In addition, you can also limit the selection of the displayed receipts with the data setting. The individual posts of the list are colored according to urgency, so that it is easy to recognize if a transfer is urgent (red) or if a discount (orange) is possible.
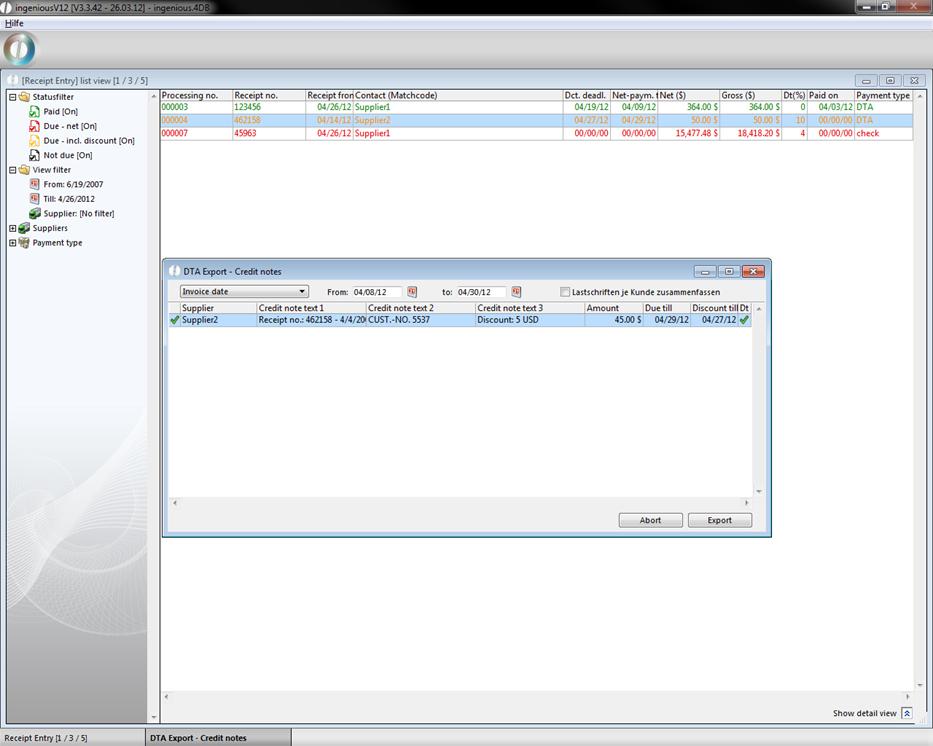
With only a few mouse clicks, you can select the desired transfers and transfer into the bank software. A time-consuming new setup does not apply here. If you click on the “Export” button, the Windows standard window opens and you can determine the desired export list. Then the document is exported as a .DTA file. Now in the receipt entry list view, the document is shown in green. If you open the detailed view of the document, you will see that in the DTA export, a checkmark is placed in the “Payments” area and also the export date was entered. The document will not be listed with a new export anymore.
The “Free summary” export function does not need to be explained at this point again.